5 Best Virtual Try-On Solutions for Online Stores
One of the biggest challenges for online stores is helping customers feel confident enough to buy without seeing the product in person. That’s especially true for items where fit and appearance matter – like glasses, jewellery, makeup, and fashion.
Virtual try-on solutions are designed to close that gap by letting shoppers preview products on themselves using a camera (or a photo). When it’s done well, it can reduce hesitation on product pages, improve the shopping experience, and help lower the chance of “wrong choice” returns.
In this guide, we’ll cover the best virtual try-on solutions for online stores, starting with a quick shortlist (best for specific use cases) and then a deeper breakdown of each option, including key features, pros/cons, and pricing considerations.
What is Virtual Try-On and Why is it important for online stores?
Virtual try-on (VTO) is a way for customers to see how a product looks on them before they buy. It typically works through a live camera experience (AR) that overlays the product in real time, or by using a selfie to generate a preview. It’s most common for eyewear, jewellery, and beauty products – anywhere the decision depends heavily on appearance and fit.
For online stores, virtual try-on matters because product photos don’t answer the buyer’s biggest question: “Will this suit me?” When shoppers aren’t sure about fit, colour, or style, they either leave the page or buy with hesitation (which can lead to more returns). A good try-on experience reduces that uncertainty right where it happens, on the product page, helping customers feel confident enough to add to cart and check out.
5 Best Virtual Try-On Solutions for Online Stores
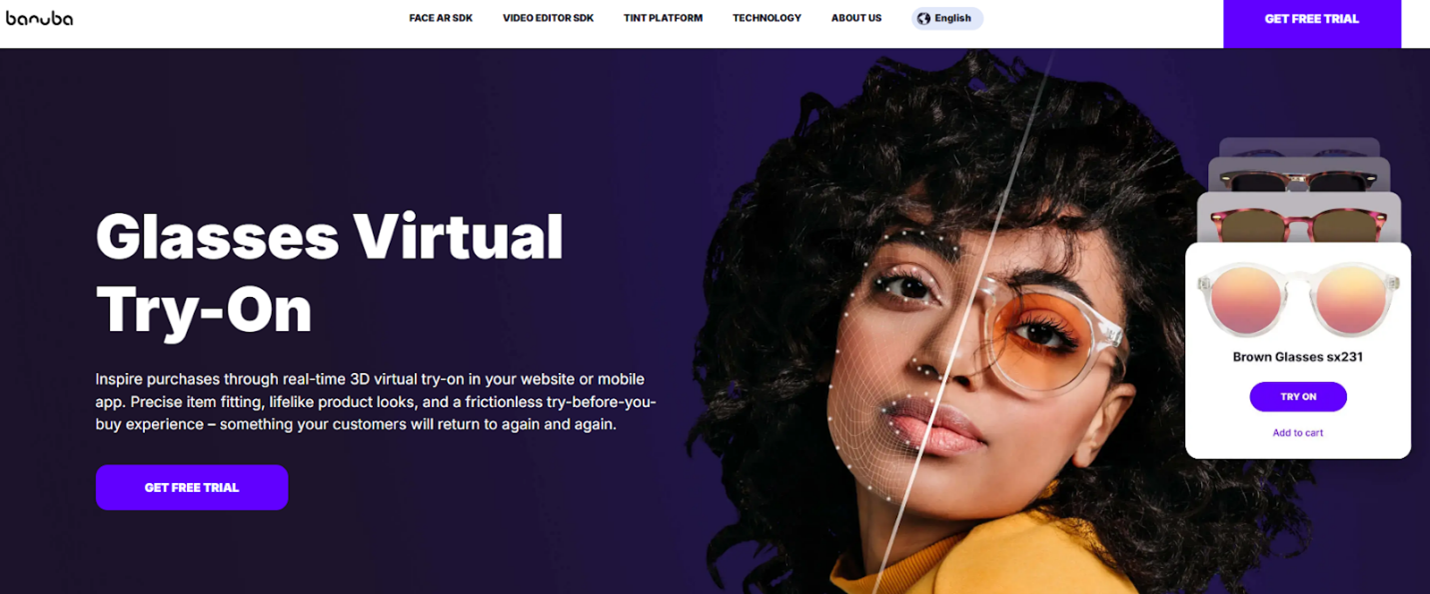
1. Banuba Glasses Virtual Try-On
Banuba’s Glasses Virtual Try-On enables shoppers to preview frames in real time with a 3D try-on experience that works on both websites and mobile apps, making it easier to choose eyewear confidently before purchasing.
The solution is positioned around precise item fitting, lifelike product appearance, and a frictionless try-before-you-buy experience – useful for reducing “will this suit me?” hesitation on product pages. It also highlights capabilities like advanced face tracking for precise eyewear placement and realistic looks (lighting, motion, and rendering) for a more natural preview.
Pros
- Real-time 3D eyewear try-on for “try-before-you-buy” shopping
- Built to work in a website or mobile app
- Emphasis on precise fitting and realistic representation (lighting/texture/physics)
Cons
- There’s a free trial, and final pricing is typically based on your setup and requirements (so you’ll confirm details during onboarding).
Pricing
Banuba promotes a “Get Free Trial” entry point on the product page, with commercial terms confirmed based on your intended implementation.
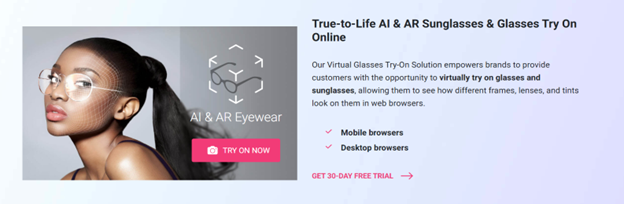
2. Perfect Corp
Perfect Corp’s eyewear solution is built around an AR glasses try-on flow that highlights pupillary distance (PD) measurement and a guided customer journey (select frames → camera try-on → PD detection → preview/customise).
A practical advantage is that Perfect Corp also offers published plan-and-pricing pages for its online eyewear try-on widget, which can suit stores that want clearer starting costs and a more “self-serve” rollout.
Pros
- Strong focus on PD auto-detection for eyewear fit confidence
- Clear plan tiers (Essential / Premium / Enterprise) on the pricing page
- Positions as easy to integrate into e-commerce platform journeys
Cons
- Pricing shown in-page may vary by currency/exchange rate and plan limits (SKUs/users)
- Best suited to eyewear; broader category coverage depends on enterprise tier
Pricing
Published monthly plans (example shown in Japanese Yen): Essential ¥53,741/month and Premium ¥81,561/month, plus Enterprise via quote.
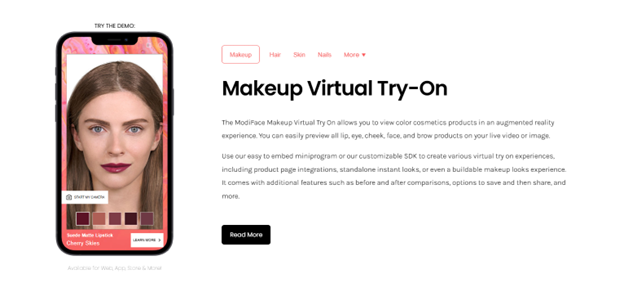
3. ModiFace
ModiFace is strongly beauty-focused, offering AR try-on experiences for makeup (and also hair and nails). Their makeup try-on is positioned for both live video and image-based previews and supports multiple cosmetic categories (lip, eye, cheek, etc.).
If your store’s biggest friction is shade selection (“will this colour suit me?”), a beauty-first platform like this tends to be a better match than eyewear-first or apparel-first solutions.
Pros
- Clear focus on beauty try-on categories (makeup/hair/nails)
- Supports web + iOS + Android in pricing inclusions
- Includes before/after and capture-style features (positioned in product/pricing notes)
Cons
- Pricing is described as annual licensing rather than simple monthly plans
- Better fit for beauty than for eyewear/apparel-focused stores
Pricing
Virtual try-on is described as an annual license per major service (hair/nails/makeup) and includes “unlimited try-ons” and “unlimited SKUs” in the listed inclusions; contact required for exact figures.
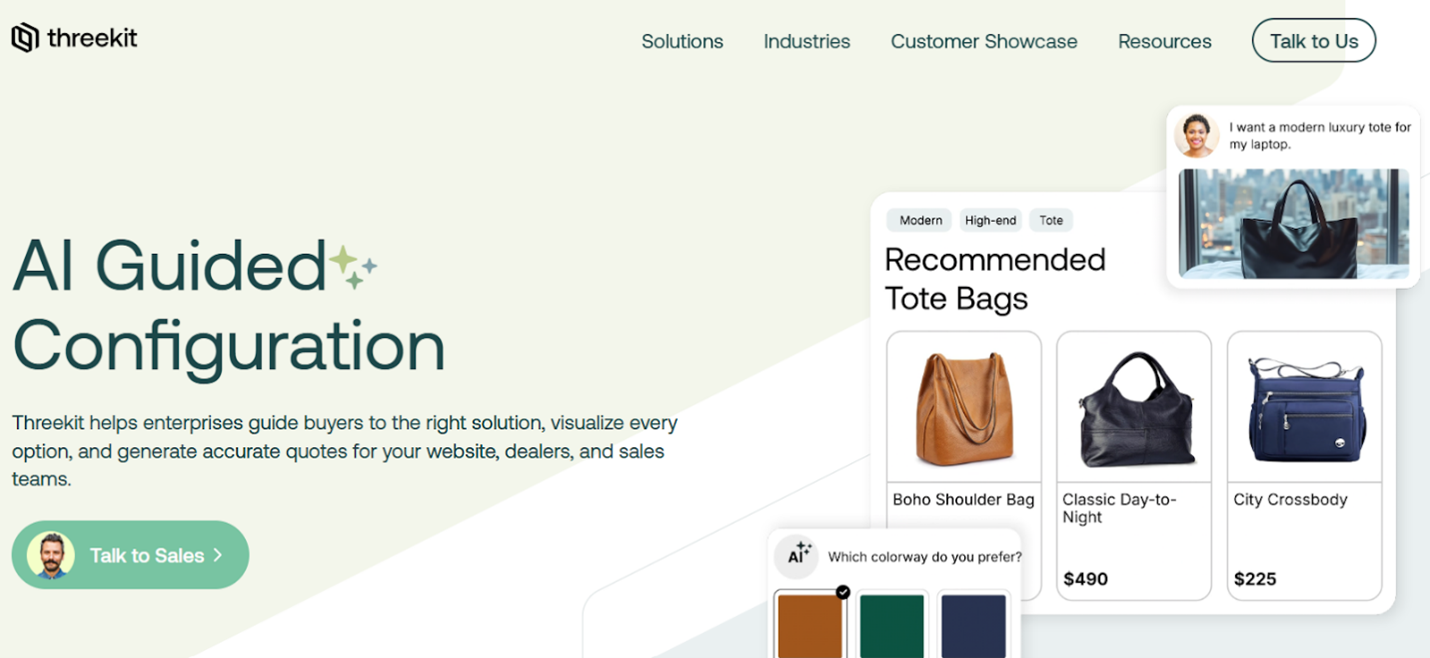
4. Threekit
Threekit is less “face try-on” and more about interactive 3D product experiences – especially for configurable products where customers need to see options change in real time (materials, components, colours, etc.).
If your store sells products where the key buying hurdle is “I can’t picture what I’m actually getting,” a strong 3D configurator/visualiser can deliver similar confidence benefits to try-on (just for different categories).
Pros
- Built for interactive product configuration and 3D visualisation
- Supports AR-style “place in space” experiences as part of the stack
Cons
- Not an eyewear/makeup overlay try-on tool (different use case)
- Implementation depends heavily on product data and 3D assets
Pricing
Threekit states pricing is custom and varies by use case, product count, and scope; quote required.
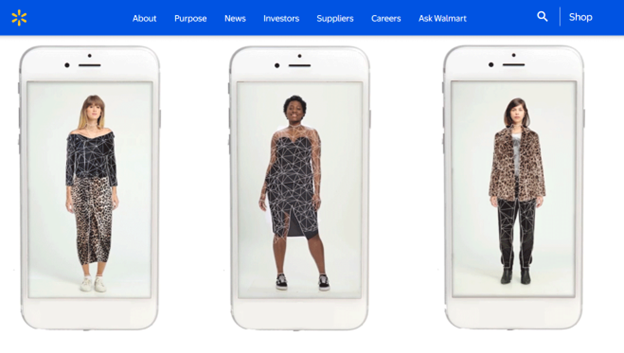
5. Zeekit
Zeekit is best known through large-scale retail deployments (notably Walmart), where shoppers can choose from different models or use “be your own model” style experiences to preview apparel fit and look.
For most small-to-mid online stores, Zeekit is more of a “what enterprise retailers do” benchmark than a plug-and-play widget – useful context if you’re comparing what’s possible in apparel try-on.
Pros
- Proven concept in large-scale apparel try-on rollouts
- Strong “see it on a model like me” positioning
Cons
- Not typically marketed as a simple SMB install (often enterprise/retailer-led)
- Pricing not publicly listed
Pricing
Not publicly listed in available vendor/retailer materials.
Key features to compare in virtual try-on platforms
1) Category fit (eyewear vs beauty vs apparel vs jewellery)
Not all try-on tools are built for the same products. Start by matching the platform to your main category – eyewear needs accurate face-fit, beauty needs shade realism, and apparel often needs a different “dressing room” approach.
2) Try-on method (live camera vs photo vs 3D visualisation)
Some solutions focus on live AR using the shopper’s camera, others use a selfie upload, and some are built around 3D product viewing rather than face-based try-on. The right method depends on what your customers expect and what you can support.
3) Realism and fitting accuracy
For eyewear and jewellery especially, look for realistic placement and natural movement, so the product doesn’t look like it’s “floating.” Accuracy matters because it directly affects trust.
4) Where it works (web, mobile app, or both)
Decide if you want try-on only on your website product pages, inside your mobile app, or across both. “Works everywhere” is usually the safest choice if you’re investing in the feature.
5) Asset and setup requirements
Check what you need to provide to launch: product images, 3D models, shade data, or product dimensions. The more asset-heavy the setup, the more time you’ll need for rollout.
6) Integration effort and platform compatibility
Confirm how it will integrate with your store (Shopify, WooCommerce, custom build, headless). Also check whether it supports embedding on PDPs and whether you’ll need developer time.
7) Performance on mobile
A try-on feature must load fast and run smoothly on phones. If it’s slow or glitchy, customers won’t use it – no matter how good it looks in a demo.
8) Analytics and measurement
Look for ways to track impact: engagement rate, add-to-cart uplift, conversion rate changes, and return-rate impact. You’ll want proof it’s working, not just “it looks cool.”
Implementation tips (data prep, product assets, PDP placement, performance, measurement)
Data prep: get your product info clean first
Make sure product pages have consistent naming, variants, and key attributes (size, colour, lens type, frame width, etc.). Clean data helps you roll out try-on faster and reduces setup issues later.
Product assets: start with your best-sellers
Launch with a small set of top products instead of your entire catalogue. This keeps the first rollout simple and lets you validate results before you scale.
PDP placement: make try-on easy to find
Place the try-on button near the main product image and “Add to Cart” area—not buried in tabs. Use clear wording like “Try on” or “Virtual try-on,” and keep it visible on mobile.
Performance: optimise for mobile first
Most try-on usage happens on phones. Test load speed, camera permissions, and responsiveness on common devices and browsers. If it feels slow or clunky, adoption will drop.
Measurement: track the impact, not just usage
Define success metrics before launch, such as:
- try-on engagement rate (clicks/uses)
- add-to-cart rate for products with try-on
- conversion rate lift
- returns on try-on-enabled products (where applicable)
Rollout: pilot → refine → expand
Start with one category (or 20–50 products), improve based on what users do, then expand. This approach is safer, faster, and easier to manage than a full-catalogue launch on day one.
FAQ
What is virtual try-on?
Virtual try-on lets shoppers preview a product on themselves digitally, usually through a live camera experience (AR) or by using a selfie – before they buy.
Which products benefit most from virtual try-on?
It works best for appearance-led products like glasses and sunglasses, beauty and cosmetics, jewellery, and some fashion/apparel items where customers often hesitate about fit or style.
Do customers need to install an app?
Not always. Some solutions run directly in a web browser on the product page, while others are designed for mobile apps (and some support both).
Is virtual try-on hard to add to an online store?
It depends on the platform and your catalogue. Most stores start with a pilot on best-sellers, then expand once the setup is proven.
What assets do I need to launch?
Typically, you’ll need clean product data and product visuals. Depending on the solution and category, you may also need 3D models, dimensions, or shade mapping (for beauty).
Where should I place a virtual try-on on my site?
The best spot is on the product detail page, close to the main product image and the “Add to Cart” button, so shoppers see it at decision time.
How do I measure whether it’s working?
Track try-on engagement, add-to-cart rate, conversion rate for try-on-enabled products, and – where possible – return rate changes for those items.